Tuesday, June 15, 2010

Java Garbage Collection : Unexpected Full GC

I've been digging garbage collection logs these days. We have a production server which suffers long pauses of garbage collection. According to garbage collection log file, there are three different cases that force the JVM to do a StopTheWorld collection:

1. Full GC after a promotion failure: This is the evidence of not enough contiguous space in the old (tenured) generation. The simplest solution to this is increasing heap size. (I am glad it worked for us.)

2. Full GC after a concurrent mode failure (in other words; full promotion guarantee failure) : CMS collector can not catch up with the object allocation speed of the application. If this is the case try setting CMSInitiatingOccupancyFraction to a lower value. CMS will start early but will finish its job on-time.

3. The third one was very difficult for me to figure out. Here is what it looks like: Everything seems to work fine but suddenly Full GC kicks in and 37 seconds of break for application threads.

216066.711: [GC 216066.713: [ParNew: 911554K->71428K(943744K), 0.0860545 secs] 2346321K->1508264K(4089472K), 0.0878449 secs] [Times: user=3.63 sys=0.32, real=0.09 secs]
216066.896: [Full GC 216066.897: [CMS: 1436836K->1003062K(3145728K), 37.8691646 secs] 1527124K->1003062K(4089472K), [CMS Perm : 86016K->31249K(86016K)], 37.8707796 secs] [Times: u
ser=37.64 sys=0.35, real=37.87 secs]
216106.398: [GC 216106.399: [ParNew: 838912K->46337K(943744K), 0.0555625 secs] 1841974K->1049399K(4089472K), 0.0573404 secs] [Times: user=1.33 sys=0.45, real=0.06 secs]
The above log says that in order to clean permanent generation a full collection occured and (86016 - 31249) kilobytes of space freed in permanent generation.

What I've learned today is : The garbage of the permanent generation is only collected by a Full GC. If you see unexpected full collections try expanding permanent generation.

Monday, June 7, 2010

Project Voldemort

Üniversitede bilgisayar mühendisliği okuyup da veritabanları dersini almayan yoktur. Veritabanı dersinde bize ilk öğretilen şey "normalization" oldu, dediler ki :

  • Aman tablolarda tekrar eden bilgiler olmasın. (Primary Keys, unique constraints)
  • Sakın farklı yapıdaki bilgileri getirip aynı tabloya koyma. Herbir farklı yapı için ayrı bir tablo oluşturmaya özen göster.
  • Müşterinin adres bilgilerini Adres tablosuna, sipariş bilgilerini Siparis tablosuna, kişisel bigilerini Musteri tablosuna koy. Denizli'den sipariş veren 30 yaşından küçük müşterileri bulmak için Adres, Sirapis ve Musteri tablolarını çarp (join dediğimiz olay da sonuçta tabloların bir çarpımıdır), işte sana istediğin bilgi.

Bu yöntem yıllarca bilişim sektörünü idare etti. Hala birçok alanda idare etmeye devam ediyor. Bugün Oracle olmasaydı ne yapardık :D Artan ihtiyaçları karşılamak için günümüzde uyguladığımız yöntem, eğer bütçe yeterli ise Oracle'ı çalıştıracak daha güçlü bir makina satın almak oluyor. İşlemci gücünü artırmak için her ihtiyaçta daha güçlü bir makinaya taşınmak gün gelir çözüm olmaktan çıkar. Bu tür durumlarda iş gücünü birden fazla sunucuya dağıtmak gereklidir. İlişkisel veritabanları dağıtık ortamlarda (distributed) beklenen performansı veremeyebilirler, çünkü network üzerinde farklı makinalarda olan sunucular arasında basit bir SQL join'i çalıştırmak çok güçtür.

Web 2.0 ile beraber internet kullanıcılarının içerik paylaşması internet sitelerinin işlemesi gereken bilgiyi inanılmaz derecede artırdı. Bunun en çarpıcı örneği Twitter. Twitter aracılığı ile gönderilen tweet sayısı günde 50 milyon'a ulaşmış durumda. (Saniyede yaklaşık 600 tweet) Depolanan veri miktarı arttıkça bu verileri bölümleyip (partition) birden fazla yerde saklama ihtiyacı ortaya çıkıyor. Milyonlarca kayıt barındırıdan ve farklı disklerde olan tablolar ile yapılan join işlemleri uygulamaların okuma (read) performansını olumsuz etkilediği için NoSQL depolama sistemleri geliştirilmiştir. NoSQL sistemler, RDBMS'lere göre veriyi daha hızlı işlerler, okuma ve yazma performansları RMDBMS'lere göre çok daha iyidir. Bunun diğer bir sebebi de RDBMS'lerin ACID (atomicity, consistency, isolation, durability) kısıtlarını yerine getirmek zorunda olmaları ve bunun için ekstra işlemler yapmak zorunda kalmalarıdır. NoSQL depolama sistemleri RDBMS'leri ortadan kaldırmayacak fakat bazı uygun projelerde RDBMS'lerin yerini alacak gibi gözüküyor.

Bu yazıda LinkedIn'in kullandığı ve duyurduğu bir proje olan Project Voldemort'tan bahsedeceğim. LinkedIn, iş dünyasının facebook'u olarak biliniyor. SSS sayfasında söyledikleri doğruysa 8 Nisan 2010 itibari ile 65 milyon üyesi varmış. 65 milyon üyenin birbirleri ile olan bağlantılarını, iş tecrüblerini, oluşturdukları profesyonel grupları hesaba katınca ortaya inanılmaz boyutlarda bir veri çıkıyor. LinkedIn mühendisleri (eminin onların bizlerden bir farkı yok :D ) bu kadar çok veriyi saklamak ve işlemek için Amazon'un Dynamo'sundan ve memcached'den esinlenerek Voldemort'u yazmaya karar vermişler. Böyle güzel bir projenin ismi neden Voldemort olur onu da anlamış değilim. Bknz : Lord Voldemort

Project Voldemort'un ne olduğunu kısaca şöyle açıklayabiliriz:

  • Dağıtık (distributed) bir sistemdir. Veriler birden fazla lokasyona dağıtılmış saklanabilir.
  • Verilere erişim aynı bir Hashtable'a erişim gibi key'ler ile yapılır. SQL gibi bir sorgulama dili desteklemez.
  • Verileri diske yazar. Sistemin kapatılıp açılması verilerin kaybolmasına sebeb olmaz.

Projesinin ana sayfasında yazan Voldemort'un ne olduğunu anlatan maddeler ise şöyle:

  1. Veriler otomatik olarak sunucu grubundaki diğer makinalara kopyalanır(replicated)
  2. Veriler otomatik olarak bölümlenir (partitioned). İstediğin bir veriyi bulmak için bütün makinalar aranmaz, sadece tek bir makinaya bakarak veriler bulunabilir.
  3. Sunucu grubu içindeki bir sunucunun kapanmasından uygulama etkilenmez.
  4. Veri bütünlüğünü sağlamak için veriler versiyonlanır.
  5. Her bir sunucu diğer sunuculardan bağımsızdır. Single Point Of Failure (bunun türkçe karşılığını bulamadım. Kendim birşey uydurayım dedim beceremedim) SPOF yoktur.
  6. Basit bir arayüzü vardır. SQL desteklemez. Join'leri kod içinde sizin yapmanız gerekir.
    value = store.get(key)
    store.put(key, value)
    store.delete(key)
    
  7. Verileri diskte depolarken ön belliğinden, disk okuması yapmadan, verilere erişim sağlar. Ayrıca bir caching katmanı kullanmaya gerek kalmaz.
  8. Bu çok hoşuma gitti : Verileri depolama katmanı taklit edilebilir(mockable). Unit testler sadece hafızada çalışan bir Voldemort instance ile yapılabilir.

Bu projeyi deneme fırsatım olmadı. En kısa zamanda kurup örnek bir projede kullanıp, izlenimlerimi bu sayfalarda paylaşacağım. Buraya kadar okuduklarınız ilginizi çektiyse projenin sayfasına gidip daha detaylı bilgiye erişebilirsiniz.

Sunday, March 21, 2010

Load Test Whatever You Want With Apache JMeter

This is the second post about load testing with Apache JMeter, read the first post here: A step by step tutorial about load testing relational databases.

JMeter has lots of Samplers. If you need a sampler that is not provided by JMeter you can write your custom sampler. (custom samplers are called "Java Request" in JMeter terminology)
This post will show you, step by step, how to write a JMeter Java Request.

Step 1: Preparing the development environment

Add these two jar files to the java classpath.
  1. $JMETER_HOME/lib/ext/ApacheJMeter_core.jar
  2. $JMETER_HOME/lib/ext/ApacheJMeter_java.jar
(If you are using Eclipse, add these files as external jar files to the java build path.)

Step 2: Extending AbstractJavaSamplerClient

After setting up the classpath, create a custom sampler by extending AbstractJavaSamplerClient and override the following methods.
public Arguments getDefaultParameters() {...}
public void setupTest(JavaSamplerContext context) {...}
public void teardownTest(JavaSamplerContext context) {...}
public SampleResult runTest(JavaSamplerContext context) {...}
getDefaultParameters
Implement getDefaultParameters if you want initial values for test paramters. JMeter will display the parameters in its Java Request configuration GUI. (See the contents of the red rectangle in the picture below.) Here's an example implementation:
public Arguments getDefaultParameters() {
    Arguments defaultParameters = new Arguments();
    defaultParameters.addArgument("memcached_servers", "localhost:11211");
    defaultParameters.addArgument("username", "testuser");
    defaultParameters.addArgument("password", "testpasswd");
    return defaultParameters;
}
setupTest
This is where you read test parameters and initialize your test client. JMeter calls this method only once for each test thread.

teardownTest
Clean up the mess.

runTest
Write your test logic in this method. JMeter will call runTest method for every execution of test threads. Here is a typical runTest implementation:
@Override
public SampleResult runTest(JavaSamplerContext context) {
    SampleResult result = new SampleResult();
    boolean success = true;
    result.sampleStart();
    //
    // Write your test code here.
    //
    result.sampleEnd();
    result.setSuccessful(success);
    return result;
}
The time elapsed betweed result.sampleStart() and result.sampleEnd() is used to calculate average response time of the application under test.

Step 3: Deploy your custom sampler

When you are done create a jar file (containing your custom sampler) in the $JMETER_HOME/lib/ext/ directory. JMeter will display your java request in the java request configuration page.

You can see the results of your test by adding listeners to your test plan. "A step by step tutorial about load testing relational databases" post shows how to add listeners to test plans.

Sunday, March 14, 2010

Load Testing Relational Databases With JMeter

Apache JMeter is a performance testing tool which is entirely written in Java. Any application that works on request/response model can be load tested with JMeter. A relational database is not an exception: receives sql queries, executes them and returns the results of the execution.

I'am going to show you how easy it is to set up test scenarios with the graphical user interface of JMeter. But before diving into details let's give a shot to basic terms:

Test plan : describes a test scenario
Thread Group : represents users running your test scenario.
Samples : a way of sending request and waiting response. HTTP request, JDBC request, SOAP/XML-RPC request and java object request are examples of samples.
Logic Controller : used to customize the logic that JMeter uses to decide when to send requests
Listeners : receives test results and displays reports.
Timers : cause JMeter to delay a certain amount of time before each request that a thread makes.
Assertions : test that application returns expected responses

Note : This post is not meant to be an alternative documentation for JMeter. JMeter has a great documentation. You can find the details in its User's Manual (http://jakarta.apache.org/jmeter/usermanual/index.html
Suppose we have an application that logs every transaction into a relational database. We are going to create a test plan - step by step - in order to answer the questions below.
  • How many transaction records can be inserted to transaction table in a second?
  • How much time does it take to insert a single transaction record to transaction table?
  • How does number of concurrent threads (users) affects the inserts/secs and average response times?
  • How does number of records affects the insert/secs and average response times?

Step 1

Copy mysql jdbc driver into the lib folder of your JMeter installation. JMeter needs a suitable jdbc driver in the classpath to connect to the database.
Example ~/tools/jakarta-jmeter-2.3.4/lib/mysql-connector-java-5.0.5.jar
We are going to store orders of the customers and the result of the order in the transactions table.
CREATE TABLE transactions (
    id INT NOT NULL AUTO_INCREMENT,
    customer_id INT NOT NULL,
    order_id INT NOT NULL,
    result INT,
    PRIMARY KEY (id)
);

Step 2

Create a test plan and name it "Test MYSQL DB". Then add the following jmeter components to the test plan.
  1. Thread group named 'Database Users'
  2. Sampler of type JDBC Request
  3. Config element of type JDBC Connection Configuration
  4. Three config elements of type Random Variable
  5. Listener of type Summary Report
After adding these components JMeter test plan looks like the following picture.

Step 3

Configure database users. The thread group component simulates the database users.
1. Number of users (threads)
2. How many times a user will send request (loop count). If you select 'Forever', threads will run in a while(true) {...} loop until you decide to stop the test.

Step 4

Configure JDBC connection pool. JDBC Connection Configuration component is used to create jdbc connection pools. Database url, jdbc driver, database user and password are configured with this component. Connection pools are identified by "Variable Name". JDBC Samplers (requests) use this variable name (connection pool name) to pop and push connections. I named the test connection pool as "my db pool"

Step 5

Define random variables that will be used in INSERT statements. In this test I am using three random variables : user id, order id and result. Following picture shows the a random number configuration for user id. Random number generator will give us a random integers between 1 and 1000000. We can refer to generated random number with the name user_id.

Step 6

JDBC Request component is the place where we tell our users (threads) what to do. The name of the pool that was configured in Step 3 "my db pool" will be used as the "variable name bound to pool". All threads will execute prepared statements. User id, order id and result will be generated by the random number configurator (described in Step 5)

Step 7

Now we have our threads configured to insert transaction records to the transactions table. In this last step we will add a Listener of type Summary Report in order to view test results.

The results tells us that 10 concurrent users (threads) working in an infinite loop can insert nearly 3300 rows in our transactions table. And the average time spent for inserting a row is 2 ms. You can also choose "Graph Results" listener to view visual representation of the results.
I created and run a simple DB test plan. I hope you'll find this post helpful. Keep this motto in mind
if you can’t measure it, you can neither manage it nor improve it
Happy testing...

Monday, February 1, 2010

2010 Winter Olympics - Bahçeköy/İSTANBUL

Hi everybody, I've been busy training hard for the winter olympics. You can watch me practicing bobsleigh with my two assistants Johny and Karsaf :)


Monday, November 30, 2009

Camping at YediGöller National Park

Campground near the lake. Autumn leaves every where.


Delicious spring water.

Ladies were responsible for dinner. Gentlemen were responsible for lighting the fire and keeping it burning all night long. The night was freezing.


Warming under the sun.


Breakfast with my cousin Ozan. (I am the man in black on the right side)


Posing on bridge, with my wife Nurten.


Upside down...


Leaving everything behind...

Tranquility..

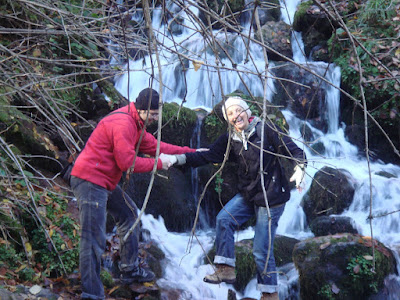
Saving Nurten :)

View of the lakes from the mountains of Bolu.

And special thanks to Jazz, for keeping us comfortable while passing over mountains...

There are more (high resolution) photos in my public picasa library.

Saturday, September 12, 2009

Python API for Flickr Services - Part I

These days I am working on a facebook application that mashes up servises from Facebook and Flickr. The application is hosted by Google Appengine and I am developing on Django web application framework.

Flickr has an easy to use API which is called Flickr Services. Here are some interesting things you can do with the Flickr Services:


  • You can upload photos from anywhere (web application, desktop application or mobile application)
  • You can search for images. Flickr Services lets you search images by
    - tags
    - geo location
    - photo taken time / photo upload time
    - and more...
  • execute methods that require authentication
    - create, edit, remove tags
    - create, edit, remove photo sets
    - replace, remove photos

There are two Python APIs listed in the Flickr Services page:

  1. http://www.stuvel.eu/projects/flickrapi
  2. http://code.google.com/p/flickrpy/

I have implemented Flickr services in Python. Don't think this as "reinventing the wheel" because it was a coding practice for me. Plus, i have my own, customized, shortcut methods ;)

You can download the library from http://code.google.com/p/ilkinulassandbox/. There are also some other javascript and python code snippets there.

Here is a basic usage of the API:

>>> import flickr
>>> api = flickr.FlickrAPI('API_KEY','SECRET_KEY')
>>> api.search({'tags':'python', 'per_page':'3'})
{'photos': {'page': 1,
'pages': 8326,
'perpage': 3,
'photo': [{'farm': 4,
'id': '3911963732',
'isfamily': 0,
'isfriend': 0,
'ispublic': 1,
'owner': '30041312@N03',
'secret': '44aae23e98',
'server': '3090',
'title': 'Centralian Carpet Python (Apophis)'},
{'farm': 3,
'id': '3911184515',
'isfamily': 0,
'isfriend': 0,
'ispublic': 1,
'owner': '30041312@N03',
'secret': '0aae3c8127',
'server': '2513',
'title': 'Centralian Carpet Python (Apophis)'},
{'farm': 3,
'id': '3911127131',
'isfamily': 0,
'isfriend': 0,
'ispublic': 1,
'owner': '31355375@N02',
'secret': '2921fea364',
'server': '2564',
'title': 'Sendra Python Nails 122 01'}],
'total': '24977'},
'stat': 'ok'}

Methods of the API returns a dictionary instance. Caller must handle the returned result.

>>> result = api.search({'tags':'python', 'per_page':'3'})
>>> result['photos']['photo'][0]['id']
'3911751961'


Flickr photo url construction is described here in details. You can easily get the url of a returned photo search result by using build_photo_url. Default image size is 'm' which means 'normal'

>>> api.build_photo_url(result['photos']['photo'][0])
'http://farm4.static.flickr.com/3462/3911751961_43d409cf7c_m.jpg'
>>> api.build_photo_url(result['photos']['photo'][1], size='s')
'http://farm3.static.flickr.com/2613/3911666353_ac0cc98871_s.jpg'


Lets search for pictures tagged 'fun' around point (lat=41.070293, lon=28.24894)

>>> pictures = api.search({'lat':'41.034046', 'lon':'28.980217', 'radius':'10', 'radius_units':'km','tags':'fun'})
>>> api.build_photo_url(fun_pictures['photos']['photo'][20])
'http://farm1.static.flickr.com/116/293251976_ce5337908d_m.jpg'


The next post of "Python API for Flickr Services" will show how you can call methods that require authentication. For the curious readers the api is ready http://code.google.com/p/ilkinulassandbox/. But it lacks documentation :(


NOTE : I use this python API in my facebook application "Türkiye'yi ne kadar iyi tanıyorsun?". Application is a simple guessing game. You see a geo tagged picture from flickr and you answer which city this picture belongs.

UPDATE : This library returns native Python datatypes rather than XML trees or unparsed JSON, which the other Flickr APIs have a tendency to do. (Thanks martian)